 Last week Boy #2 used his hard-earned savings to buy a little quadcopter. With practice, he has become rather adept at piloting rather than crashing and has had a lot of fun. But what intrigued me the most was that it contains a camera which can take still pictures or video. Since I didn’t think it would be nice to take over the boy’s new toy and since it is was my birthday, I decided could buy my own toy.
It’s not easy to jump into the world of UAVs (Unmanned Aerial Vehicles). I quickly discovered that there are too many choices out there. You can spend anywhere from less than $20 to several thousands of dollars. There are many different types which have various characteristics and strengths. To further complicate things, there are recent laws and regulations affecting the use of UAVs.
Since I’m interested in the video/photography side of things and wanted something easy to fly and with a decent camera–that narrowed down the field a lot. Also, though not a hard requirement, I thought that supporting a FPV (First person View) would be neat. I did a fair amount of reading reviews and looking at different options in my “few hundred dollar” price range. If I already had a good camera like a GoPro, I might have gone with a Phantom, but since I needed a camera, I ended up going with a Parrot Bebop.
I knew I would want to play with my new toy as soon as I got it, so I started my preflight tasks before it was delivered.
First was all the legal stuff. Because the Bebop weighs more than .55 pounds I had to register with the FAA. I installed the FAA B4UFLY app which told me I was less than 5 miles from an airport and needed to notify them of my intent to fly. Of course they don’t publish the telephone number of the tower, so it took a little web searching and e-mailing to find the correct contact information. I then sent an e-mail containing the checklist information from Guidance for UAS ATCT Notification Calls. For the time and duration of operation I said “Daylight hours” and gave the dates for spring break. I didn’t receive a response, but the airport doesn’t approve flights, they can only deny flights. Since I’m more than 4 miles from the airport and won’t be going above 400 feet, I doubt they care, but if they do they know how to contact me.
Next I installed FreeFlight 3 onto my phone. I tried playing with the app, but there isn’t much you can do without something to control. So then I just had to wait for my Bebop to be delivered.
Once it was delivered, the first step was to get a battery charging. Also, I wrote my FAA UAS Certificate number onto the Bebop with a Sharpie. For my first flight I wanted to try it indoors, so I attached the propeller protectors. I was then ready to try to fly.
It took a few minutes to figure out how to connect to the Bebop. My phone could see the Bebop wifi network and it connected, but when I started FreeFlight, it didn’t connect up. It turns out the problem as my phone had “Smart network switch” enabled so it would see that the Bebop wasn’t connected to the Internet and automatically switch over to the home wifi which does have Internet access. Once I disabled “Smart network switch” I was able to connect.
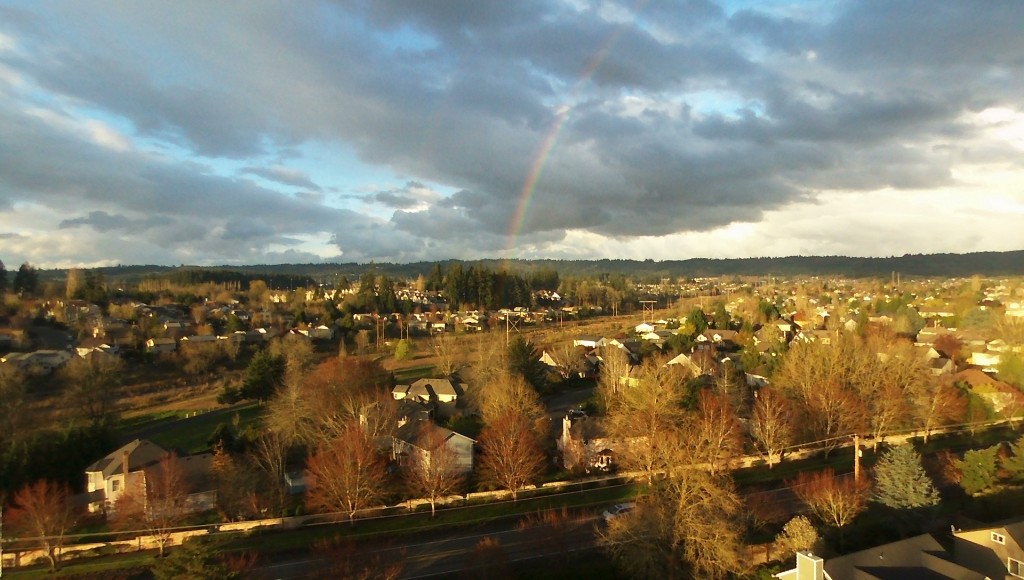
After trying to fly a bit indoors and crashing into Boy#2, it was time to take off the propeller protectors and head outside. The Bebop is fairly easy to control and all the kids took a turn. It started to rain a bit and so I was about to finish up for the evening, but then a rainbow appeared. I flew the Bebop up to about 100ft (I had the Bebop configured to go no higher than 30 meters and took it up to that max) and took a few pictures; one of which is at the top of this post. By then the rain was increasing and the battery charged was diminished, so it was time to land and return home.