And the question is?

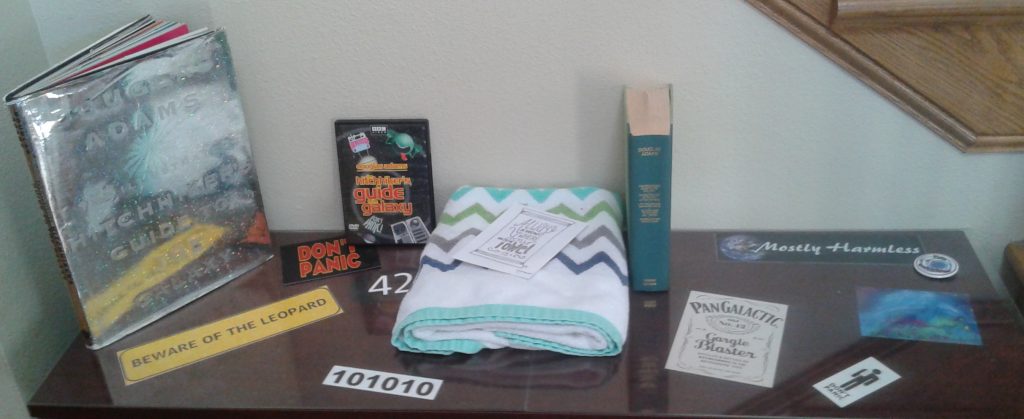
I was still in elementary school when I was first introduced to The Hitchhiker’s Guide to the Galaxy.  Initial contact was the 1984 video game on a Commodore 64 which I initially thought to be a clone of Zork, but quickly discovered it was much sillier.  I died frequently and never made it very far, but I learned to put on a robe before trying to access the pockets and to lay down in front of bulldozers.

Later (but still during my elementary school years), the BBC showed the television series.  I was expecting something like Doctor Who (and Douglas Adams even wrote “City of Death” which is one of my favourite Doctor Episodes), but quickly discovered it was much sillier.  Of all the bits in the show, the thing I remember the most is at the Restaurant at the End of the Universe where the animal that wants to be eaten.

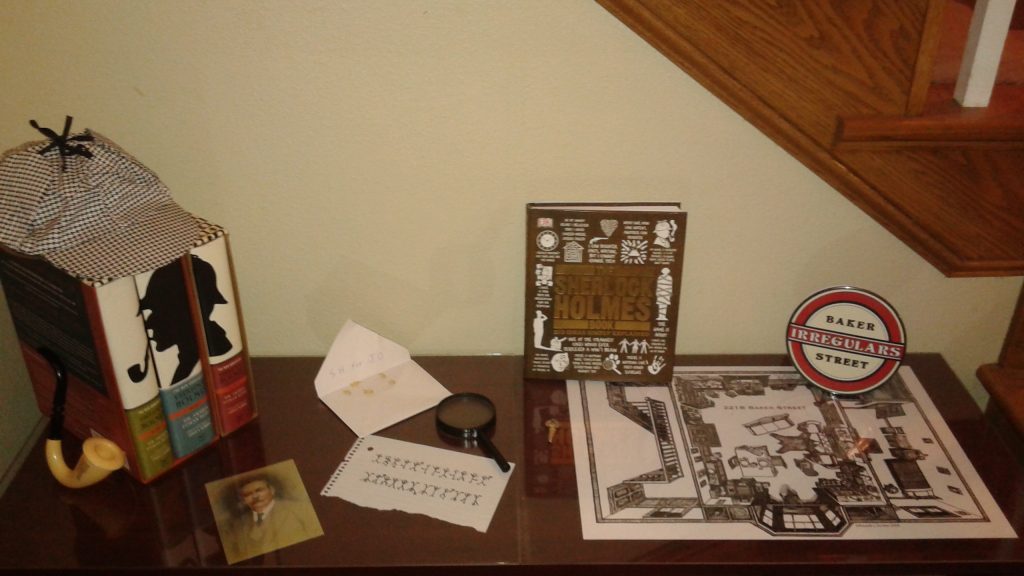
In middle school I finally read the first book and in high school school I read everything available in the series at the time.  I also explored and enjoyed the world of Dirk Gently and his Holistic Detective Agency (my favourite part of those books being the sofa in the stairway).  By then I was sufficiently well-versed in the works to be able to claim to know the location of my towel.

In college there was a guy in the dorm that had the original radio show in cassette tape and he was kind enough to let me make a copy.  I’m typically not a fan of that sort of audio format–it’s much slower than reading and requires more effort than media that has associated visual components.  Nevertheless, I really enjoy the radio show and it is my preferred version of the story.  Over the years first the radio show (now in mp3 format rather than cassette) has continued to provide entertainment during road trips.

I enjoy the silliness associated with “The Guide” in all it’s many forms–it has been and continues to be a source of entertainment for me and my family.  If I had to choose a favourite media format, I would have to go with the radio show version.  While I suspect that more people have read the book, I feel it is definitely worth a listen.


Let there be light (part 3)

In Let there be light (part 1) I played with Phillips Hue home automation and in Let there be light (part 2) I tried out the WeMo Light switch.  Both solutions work well where they are used in my home.  In this post, I’m going to compare the two and mention some things I like and dislike about the different approaches.

Cost

Retail for the Phillips Hue starter set (a hub and two bulbs) is about $70 and an Amazon Dot costs $50 so it would have cost $120 to do Boy #1’s room, but Amazon had a Black Friday deal and so I got everything for $90.

The WeMo switch is around $40, so that paired with a Dot would normally be $90, but I managed to save $20 on the Dot during a special promotion so my actual cost was $70.  Had I gone with Phillips Hue (even without needing to purchase another hub) I would have had to spend about $14 for each of six bulbs meaning it would have been $84 without the Dot.

The WeMo switch is a cheaper initial investment.  Also, assuming that switches last longer than bulbs, I think maintenance costs will also be lower.

Installation

The installation of the Phillips Hue doesn’t require messing with any wiring which is nice, but it does require setting up the hub.  The hub needs power so it has to be plugged into an outlet and it also requires a physical (wired) network connection.  Putting the bulbs in place is just like changing an ordinary light bulb.

The installation of the WeMo switch is just like swapping out any other light switch.  The switch does require having a neutral wire (not to be confused with a ground which is optional)–since my house has the neutral wire it isn’t an issue, but some homes are wired differently.

If you already have a hub in place, it’s definitely easier to screw in a new light bulb than to install a new switch.  It is also safer and requires less skill.  However, having a hub does mean one more device in the home that requires power and a physical (corded) network connection.  I think Phillips could have done better and put everything into the bulbs and not require the hub at all.

Other Aspects

  • Manual switch: With the Phillips Hue bulbs, the existing light switch can function normally, but if you use it to dim the light, that becomes the new 100% for the bulbs.  Also, if you turn it off, than the bulbs are unable to work at all via voice control.  The WeMo switch works as one one expect and doesn’t have any conflicts with voice control.
  • Dimming:  The Phillips bulbs allows dimming, but the WeMo switch is only on or off.

Conclusion

Overall, I like the WeMo switch better than the Phillips Hue bulbs.  However, there are two reasons why I’m not adding many more switches to my home.  The first is that the switches do not support multiple switches controlling the same circuit (ie they cannot work as three way switches)–compared to all the functionality already crammed into the switch, it seems to be as though it wouldn’t be overly complex to add support for that.  Also, the switches do not have dimmer functionality.

Let there be light (part 2)

My bedroom has two light switches and both of them are in awkward locations.  Because of the double door entry, access to one switch requires maneuvering around and behind one of the doors and it’s actually easier to walk across the room and use the switch in the middle of the far wall which is not near anything.  This does mean that the room must be traversed in darkness when entering or exiting.  A similar ill illuminated jaunt is required between the switch and the bed at night.

For years I have joked about getting a Clapper for the light.  However, when I tried to persue that I learned that they don’t seem to make Clapper hard wired light switches, only outlet devices for lamps and other things that use a plug.  Seeing the convenience allowed to Boy #1 with his voice activated lights, I decided to enact something similar.  Since the master bedroom has a ceiling fan with six separate bulbs, I didn’t want to go with a Hue like we did for Boy #1 in Let there be light (part 1).  Instead I decided to try the WeMo Light Switch.

It took awhile to get the switch installed, but it wasn’t particularly difficult.  Most of the time was spent running back and forth to the circuit breaker and testing wires to figure out which was which–part of the complication was that I was replacing a 3-way switch with a regular switch.  Also, the wire colors weren’t what one would normally expect.  Once the switch was in, it worked like a switch should–I could use it to turn the lights on and off.

After the switch was installed, I then had to configure it to work with Alexa.  It was similar to what I did for the Hue, so it went quickly.  Again I was happy that I didn’t have to create a new account or do anything too quickly.  I was expecting more difficulties, so I was pleased that things went smoothly

Anyway, as I approach my dark bedroom I can now turn on the light with a voice command.  And when I’m nestled in my bed, done reading for the night, and ready to sleep, I can just bark out some words and have the light go out without the necessity for a mad dash.

Let there be light (part 1)

Boy #1 has a loft bed and so it is awkward for him to adjust his light from bed.  With his birthday and Christmas both occurring in December, it seemed a good time to invest in new toys to solve the problem (and provide me with some entertainment).

For his birthday, Boy #1 was pleased to receive an Amazon Echo Dot.  The Echo has been a fixture in the kitchen for nearly two years so he understood the capabilities of the gadget.  After setting it up and pairing it with his Bluetooth speaker (also a birthday present) the music emanating from his room now sounds better than a slightly tinny cellphone speaker.

For Christmas, Boy #1 received a Phillips Hue starter set (containing a hub and two bulbs).  While light bulbs doesn’t sound like the best of presents, he quickly (and without assistance) realized the potential of integrating the Dot with the bulbs and having voice activated lights.

The setup of the Phillips Hue set wasn’t too difficult.  The biggest surprise for me was that there was no need to install any Hue app on my phone nor did I need to enable the Hue skill on the Alexa app.  After putting in the bulbs and plugging in the Hue hub (to both power and network) I just had to tell Alexa to search for devices and it found the bulbs.  Then I used the Alexa app to create a “group” and add the bulbs to the group.  After that the lights could be controlled by voice.

The boy seems to like the new setup.  Not only can the lights be turned on and off, but also can be dimmed via voice control.  Also, if necessary, the dimmer switch can still be used.  In this case, I think the Hue worked very well in solving the problem and in part 2 I will describe how I used a different implementation to solve a similar problem.

My Alarm Clock

2016-12-10-13-18-09
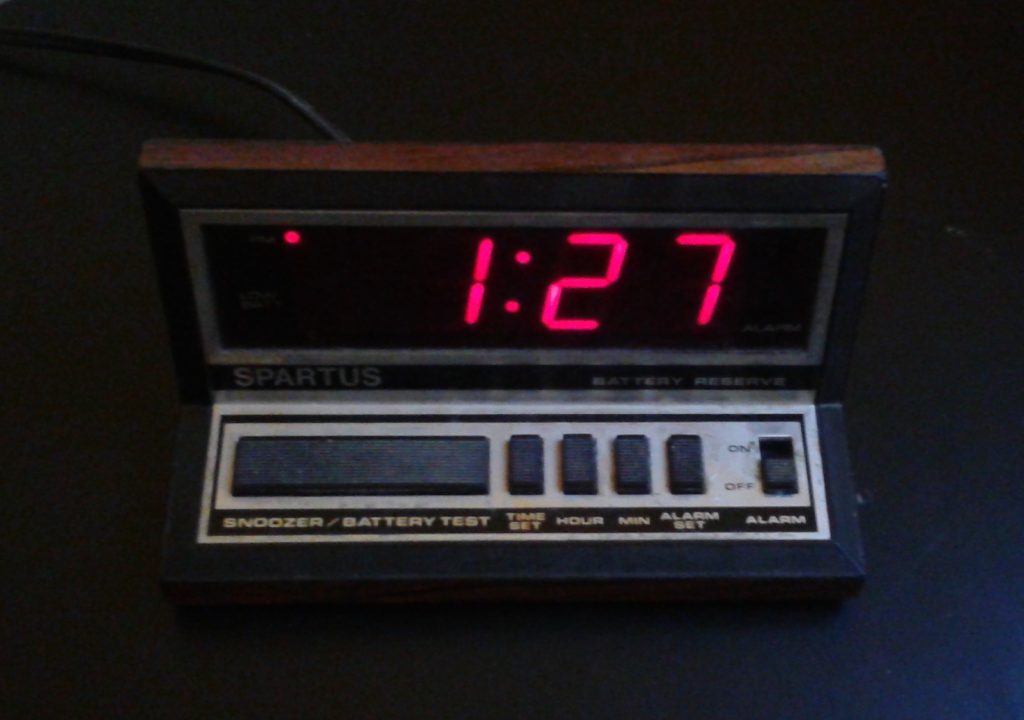
My alarm clock was a Christmas gift from my older sister in 1984 when my family was living in Papillion Nebraska (just outside Omaha).  I wanted an alarm clock so I was pleased to receive it, but I do recall mild disappointment because it wasn’t a fancy clock radio combination.  The alarm clock has been used regularly for 32 years and I hope it keeps working.  Devices have supposedly gotten a lot smarter over the past three decades, but I really like my dumb device.

I didn’t get a clock radio, but that’s fine since I don’t listen to the radio much.  When I did listen to the radio a lot, I had my boom box for my room, a Walkman for riding the bus, and when I was older, a stereo in the car.  Instead, my alarm clock just displays the time.  The bright red display can be read in the dark.   The numbers are large enough that the time can be read from across the room and glasses are not required when peering from bed to check the time.

I hate the sound of the alarm–this is a good thing.  I can sleep through a lot, but my alarm is relentless.  Some alarm clocks stop beeping after a minute, but mine will keep producing its throbbing tones for as long as it takes for me to smack the snooze button or switch off the alarm.  The alarm does a good job in waking me.

Apart from setting the time (and alarm time), there is very little maintenance required.  Since it receives power from an outlet, there are no springs to be wound.  There is a backup battery that allows the clock to function if the power goes out, but that only needs to be changed every few years.  There is no need to configure a wifi connection or do any Bluetooth pairing.  There are no online accounts to be created to use it and the clock can be used by anyone in the family without difficulty.

Compared to the alarm clocks available today, mine is a dumb device and I like it that way.  My alarm clock tells the time and wakes me in the morning.  It is reliable and requires minimal effort to use.  I can see the appeal of the fancy, but I plan to stick with my alarm clock from 1984.


I love it when a plan comes together

After spending a lot of effort and encountering difficulties in creating pieces, I am often pleasantly surprised when the pieces come together quickly and easily.  This was the case for my latest home improvement tech project.  In my home, it seems like some areas are warmer than others–I realized that some variance will exist, but I wanted to reduce the overall difference between upstairs and downstairs.

The first step was to be able to measure the temperature or each area.  Thanks to my ESP8266 development boards, I am able to publish the upstairs temperature and publish it to a database and Bakboard.  With the new Nest thermostat and a little playing with the REST API, I was able to do something similar and publish the downstairs temperature to the BakBoard.  There are now four temperatures published on the Bakboard.

temps

I then wrote a simple Java program with that basically does the following:

  1. Get the temperature of the [Downstairs] thermostat
  2. Get the temperature of the [Upstairs] temperature sensor
  3. If the difference between the two temperatures is greater than 2 degrees, turn on the furnace fan

I had a little trouble figuring out how to turn on the fan, but this is the way I implemented it in Java:

public void runFan(String thermostatId, String authToken) throws Exception {
    final String rootUrl = "https://developer-api.nest.com";
    HttpPut httpPut = new HttpPut(String.format("%s/devices/thermostats/%s/fan_timer_active", rootUrl, thermostatId));

    StringEntity putEntity = new StringEntity("true");
    httpPut.setEntity(putEntity);
    httpPut.addHeader("Content-Type", "application/json");
    httpPut.addHeader("Authorization", "Bearer " + authToken);
        
    CloseableHttpClient httpclient = HttpClients.createDefault();
    try {
        CloseableHttpResponse response = httpclient.execute(httpPut);
            
        // We need to handle redirect
        if (response.getStatusLine().getStatusCode() == 307) {
            String newUrl = response.getHeaders("Location")[0].getValue();
            httpPut.setURI(new URI(newUrl));
            response = httpclient.execute(httpPut);
        }
           
        try {
            HttpEntity entity = response.getEntity();
            EntityUtils.consume(entity);
        } finally {
            response.close();
        }
    } finally {
        httpclient.close();
    }
}

Of course I want my code to run at regular intervals, but fortunately I had already figured out how to go about running a Java program every 15 minutes.  It was easy to toss everything into a Docker container and let it do its thing.

Here are a few notes/design decisions that I made when putting things together:

  • There are no changes to the basic functionality of the Nest thermostat.  It is not aware of the external temperature sensor and heats/cools as normal.  This means, even if something goes wrong in my code (or network connection or custom hardware or somewhere else), things can’t go too crazy.
  • My code does not control the length the fan runs–it starts the fan and lets the Nest take care of turning it off.  There is a default run time that can be set on the thermostat–in my case I set it to 15 minutes to match the run duration of my new program.
  • I have a two stage furnace and when just the fan is run it goes at half speed.  Even at full speed the furnace fan is pretty quiet, and at half speed we don’t even notice.
  • The thermostat only gives me the temperature in degree increments (if I were using Celsius it would be in half degree increments).  My homemade temperature sensor goes to greater precision, but it’s hard to say whether that greater precision provides better accuracy.  I went with a 2 degree variance threshold for enabling the fan to allow for rounding differences as well as accuracy differences between upstairs and downstairs temperatures.

As far as I can tell, everything came together smoothly and “just works” and has been for the past few weeks.  Occasionally I check the log to make sure it’s still running.  Once in awhile when I walk past the Nest I notice the fan icon indicating that the fan is running (and I can verify that by putting my hand near a vent).  The weather is still mild, so it will be interesting to see what happens when it gets colder (especially when I rev up the wood stove), but so far there seems less variance in temperature throughout the house.  I love it when a plan comes together . . .

Playing with the Nest Rest API

I bought the Nest thermostat for fun. I purchased it couple months ago to go with the new furnace and air conditioner. I could have gone with a thermostat provided by the contractor, or any number of cheaper options, but I wanted something with which to play. Even though I don’t consider myself a “gadget person”, I wanted this gadget.  I wanted to play with it’s API and see what I could make it do.

With summer ending and school starting, there was a lot going on in the household.  Also, we went for about a month when neither air conditioning nor heating were required, so internal climate control was not often on my mind.  Now the heat is coming on for a few minutes in the morning and I’ve started playing with the Nest Rest API.

The Nest developer website has documentation that helped get me up and running.  As usual, the trickiest part in getting started is figuring out how to authenticate, but that actually went smoothly (I’m not sure whether I’m getting better at doing that sort of thing, or if the Nest process and/or instructions are better).  I was then able to read information about my Nest thermostat.  It was when I tried to write data that I ran into problems.

I had many failures in trying to perform a write.  At first I tried various incarnations of Java code to perform a REST PUT, but I had a variety of problems and errors.  I simplified things.  I tried a simpler use case.  I removed Java from the picture and just used curl.  Eventually I resorted to the instructions I found to change the target temperature on a thermostat:

curl
-X PUT
-H "Content-Type: application/json"
-H "Authorization: Bearer c.lPg4Z..."
-d "{"target_temperature_f": 72}"
'https://developer-api.nest.com/devices/thermostats/DEVICE_ID'

I plugged in my own authorization token and device ID, but still it wouldn’t work.  After a lot of kicking and swearing and reading various websites and forums, I came up with:

curl
-L 
-X PUT 
-H "Content-Type: application/json"
-H "Authorization: Bearer c.lPg4Z..." 
-d '72' 
https://developer-api.nest.com/devices/thermostats/DEVICE_ID/target_temperature_f

The key differences are:  1) The “-L” flag tells curl to follow the 307 redirect that is returned, 2) Passing just the desired value instead of a JSON snippet, and 3) Specifying the variable name as part of the URL.

When I plugged in my authorization token and device id, things worked–by the time I had taken the seven steps from my disheveled desk to the thermostat, the new value had taken affect and the Nest was turning on the heat.

Although there was some frustration along the way, I had fun playing with the Nest Rest API and am glad I was able to get some basic use cases to work.  Now that I know how to read and write data, I can make make something interesting.

Running a Java program every 15 minutes

I wrote a simple Java program that I wanted to run every 15 minutes.  I decided to wrap everything into a Docker image so that I would get the logging, restart capability, and portability goodness that one gets for free when running a Docker container.  It’s not a difficult thing to do, but it took me longer than it should since I made some incorrect assumptions.

Since I wanted the image to be small, I went with an “Alpine” version of the openjdk image.  My first incorrect assumption was that I could use cron and crontab like I do on Ubuntu or Red Hat systems–but Alpine doesn’t come with cron.  However, it’s actually easier than messing with crontab–I just had to put my script into the /etc/periodic/15min directory.

Once I had the script in place, I tried to run the container, but eventually discovered the the small Alpine image does not have the daemon enabled when the container starts up.  This was solved by running crond in the foreground.  Here’s a Dockerfile showing the important bits:

ROM openjdk:alpine
MAINTAINER Nathan Bak <dockerhub@yellowslicker.com>

# Create directory to store jars and copy jars there
RUN mkdir /jars
COPY jars/*.jar /jars/

# Copy bin directory of project to root directory
COPY bin/ /

# Copy runJavaApp script into correct location and modify permissions
COPY runJavaApp /etc/periodic/15min/
RUN chmod 755 /etc/periodic/15min/runJavaApp

# When the container starts, run crond in foreground and direct the output to stderr
CMD ["crond", "-f", "-d", "8"]

Here is the runJavaApp script:

#!/bin/sh
java -cp /:/jars/commons-codec-1.9.jar:/jars/commons-logging-1.2.jar:/jars/fluent-hc-4.5.2.jar:/jars/httpclient-4.5.2.jar:/jars/httpclient-cache-4.5.2.jar:/jars/httpclient-win-4.5.2.jar:/jars/httpcore-4.4.4.jar:/jars/httpmime-4.5.2.jar:/jars/jna-4.1.0.jar:/jars/jna-platform-4.1.0.jar com.yellowslicker.sample.Client

The “gotchas” I ran into with the script include:

  1. The script must begin with #!/bin/sh (out of habit I tried #!/bin/bash, but Alpine doesn’t come with bash)
  2. Each jar must be listed explicitly (I tried using /:/jars/*.jar for my path, but it didn’t work)

There are a lot of ways to schedule things, but this method was simple (once I figured it out) and I think it is robust.  In my case, it also fits well into the Docker microservice environment I’m running.

Sherlock Holmes: Predictable and Original

2016-10-09-18-12-22

Several years ago, my wife and I purchased a collection of Sherlock Holmes stories as a Christmas present for our niece and I mentioned that I had never read any Sherlock Holmes save an abbreviated version of Hound of the Baskervilles I encountered in fifth grade.  I believe my wife was appalled at this dearth in literary knowledge and as a remedy I soon received a nice version of the Sherlockian canon.  I like to consume literature in bulk–there was no intimidation at 2000-3000 pages, but rather a comfort of knowing there were many hours of reading material immediately available to me.  And so I began.

I really enjoy reading about the various adventures of Sherlock Holmes, but initially I was surprised at how well I could predict the outcome.  Not only did I out pace Watson, but sometimes even the great sleuth himself.  Initially I assumed I was just incredibly clever, but soon reality set in there was the realization that, though the details were different, the “twist” was something previously encountered.  I had read various mysteries including a binge with Agatha Christie while in college.  Before that I had ready Hardy Boys novels (also in mass quantities) and watched episodes of Scooby-Doo.  Sherlock Holmes was quite original when it was written, but it has since become the foundation upon which most modern Western mystery is built.

I think I enjoy the short stories more than the novels; that’s odd considering my general preference towards quantity.  The short stories come across as more tightly written and more focused on the mystery rather than a lot of back story.  Also, since I usually had a good idea where the story was headed, I think I missed out on a certain measure of suspense.

Even though most modern readers won’t be thoroughly astounded by the genius of Sherlock Holmes because of the predictability, it’s not due to lack of originally for it is the original.  Reading the text is a fun journey to the early days of the mystery genre.  If you haven’t yet experienced the world of Holmes and Watson, enjoy the originality and don’t fret the predictability.

The Parable of the Soccer Coach

A coach went to coach a soccer game and place his players on the field.

And as he coached, some players fell into pleasant conversation and failed to notice the game going on around.

And some players went running all over the field after the ball at a full sprint regardless of where the ball went.

And as the minutes passed they quickly tired and, because they had no stamina, whined for a sub.

And some failed to spread out and instead ended up in a clump of players resembling a rugby scrum; and the flailing feet and elbows caused bruised shins and sore ribs.

But others played their assigned positions applying practiced skills to the best of their individual abilities and together they had great plays: some scoring goals, some making assists, some playing a solid defense.