Master Inventors and Goggles

Goggles
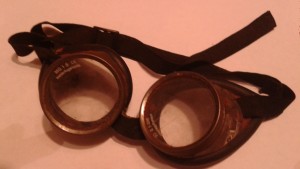
Shortly after joining IBM, I sent an inquiry to an IBMer.  I received a timely response from her and noticed in the e-mail signature was the title “Master Inventor“.  This was the first time I had heard the term and it evoked images of a job where one wears a lab coat and perchance even goggles.  I thanked the sender for the information and mentioned that I thought Master Inventor was a cool title.  She then gave a brief response  explaining the Master Inventor title and how she got there and how I could get started on the patenting path.  I do not remember who it was, but I am grateful that she took the time to provide a nice, personal response.  That is what started me down the road of turning ideas into inventions in a formal way.

About eight years later, I was honored to be named an IBM Master Inventor.  While I didn’t receive a monogrammed lab coat or goggles (sob), I did receive a nicely framed certificate that now hangs above my disheveled desk.  Less obvious than the cool title is the learning and experience I gained.  One of the things I learned is that ideas are cheap; I mean that in different ways.

Ideas are cheap.  You’ve got to work to make them valuable.  I’ve “lost” some good ideas because I didn’t take effort to write them up, define things more clearly, and actually do something with the idea.

Ideas are cheap.  Anyone can have them.  It doesn’t cost years of study or practice to have an idea.  It doesn’t take expertise.  Often I’ve heard terrific ideas from people with no knowledge of the technical area and having just heard about a problem to be solved.  It’s important to listen to the ideas of other people.

Ideas are cheap.  In brainstorming some say there aren’t any bad ideas, but there are.  The funniest of my bad ideas come when I’m half asleep and somehow I convince myself that I’ve come up with something brilliant.  Fortunately, I’ve learned not to get too attached to bad ideas–I can throw them away because they are cheap.

Ideas are cheap.  It’s OK to share ideas with others–it’s better than hoarding them.  This is especially true for ideas that aren’t accompanied by any action–perhaps someone else will see your good idea through.  In my case, my employer has first dibs on my relevant ideas (and I am compensated for them).  But ideas that are unrelated to or unwanted by IBM I am free to share.  So perhaps a future posting will describe the invention I built so that I could dance my password.

Ideas are cheap.  So try to have a lot of ideas.  I played paintball once and learned the concept of “accuracy by volume”.  If you cover the arena with paint you’re likely to also get your opponents.  If you have a lot of ideas, some of them are bound to be good.

Ideas are cheap, but I’ve gained a lot working with them.  So now when I submit my tax return (as I recently did), under occupation I specify Master Inventor.  Perhaps someone in the IRS is imagining that I wear goggles . . .

What OS for Docker host? (Part 4)

This is a continuation from What OS for Docker host? (Part 3).

discs

TinyCore

Next I tried TinyCore Linux.  I downloaded the 100MB “CorePlus” ISO instead of the minimal 10MB “Core” ISO because CorePlus contains the installer and the extra stuff for wireless.  In “Live” mode I had no problems using the no-frills utility to get the wireless working.  TinyCore has its own package manager with both a GUI and a command line tool called “tce-ab”.  I actually found tce-ab to be easier for new users than yum or apt-get since it is more interactive and prompts you with questions and choices of answers.  I used it to install curl without issue.

I didn’t have any luck installing Docker.  The package manager didn’t seem to know anything about it and the normal Docker script (which I pulled down using curl) crashed and burned without even useful errors like I’ve seen with other distributions.  Since Docker is a key use case, I want it to work and be easy to install and update.  And so I decided that I wouldn’t use TinyCore.

Conclusion

I failed.  I wanted to find a new (for me) operating system for running Docker containers.  Although I wanted something lightweight, while doing through the investigation my key requirements seemed to be:

  1. Docker (easy to install/upgrade to the current version)
  2. Remote access (since the screen is cracked, I just want to interact via SSH)
  3. Wireless support (so I can get the laptop off my disheveled desk)

Of the requirements, it seemed like getting both 1 and 3 together was the tricky part.  Most of the bare bone systems designed to run Docker assume that the machine is “on the cloud” or at least has a wired connection.  If wireless weren’t a requirement, I’d probably go with Rancher OS–I had the best experience with it apart from the wireless problems and I want to continue playing with it some time in the future.

And so I went with Ubuntu 15.10 Desktop since that was the first disc I found for something I knew I could get working.  The install of the fresh OS, wireless configuration, install of an ssh server, and installation of Docker 1.10.2 occurred while I was writing up my TinyCore experience and the above part of the conclusion.  The only “gotcha” was I forgot to change the power settings so that the laptop wouldn’t suspend was the lid was closed, but that was an easy fix.  It now sits on an unused chair in the dining room until my wife kindly suggests I find a “better” place for it.  I can connect to it via SSH and already have a microservice running on it in a Docker container.

So I failed and ended up with what I could have had a week and a half ago, but along the way I did learn about various other Linux distros and as an added bonus now have a bunch of burned discs (mostly unlabeled) to clutter up my disheveled desk.

What OS for Docker host? (Part 3)

This is a continuation from What OS for Docker host? (Part 2).

CoreOS

Reading about my plight and having experienced problems with Docker on Alpine Linux, Jan Hapke recommended CoreOS unless one needs CIFS.  Since I didn’t know anything about CIFS, I assumed I didn’t need it.  So I pulled down another ISO and burned another disc.  The installation process was fairly simple and I’d already learned my lesson about specifying authorized keys at install time during my Rancher OS exploration.  I was a little surprised that the installer didn’t ask me if I really wanted to reformat my hard drive–I knew it would and admittedly did use sudo, but usually for such potentially disastrous consequences most installers ask if you really want to lose all the data on the drive . . .

The install went fairly quickly and I was able to ssh into my machine using my key.  I checked and the Docker version was at 1.8.3–I had installed the “stable” version of CoreOS so it makes sense that it doesn’t have the very latest and greatest.  I ran a few Docker containers and everything worked smoothly and as I would want.

Then came wireless networking setup.  I couldn’t.  Searching a bit found others also wanted to use wireless with CoreOS, but the solution seems to involved manually finding the correct drivers and then reconfiguring and building the kernel. That was something I wasn’t too keen to try.  And so I decided that I wouldn’t use CoreOS.

Snappy

While searching for operating systems to try, I came across a couple articles mentioning Ubuntu Core which is known as “Snappy” and is apparently “designed for Docker”.  Since I still had CoreOS running on the laptop, the install consisted of running:

wget http://releases.ubuntu.com/15.04/ubuntu-15.04-snappy-amd64-generic.img.xz
unxz -c ubuntu-15.04-snappy-amd64-generic.img.xz | sudo dd of=/dev/sdX bs=32M

After that, since I had just run dd over the hard drive, things were understandably in a very bad state, so I forced a restart of the machine. Surprisingly Snappy booted up fine and I was able to SSH into it using the default user name and password (both “ubuntu”).

Installing Docker was pretty easy once I realized that the system didn’t have apt-get.  Using the Snappy way, I ran:

sudo snappy install docker

This gave me version 1.6.2 of Docker.  I tried running “sudo snappy update docker” but it just seemed to update ubuntu-core.  When I went to install Docker directly from docker.io, I discovered that not only does Snappy not come with wget or curl, it doesn’t even seem to have an easy way to install those tools (though some people have found complicated ways to install them).  Since I just wanted to fetch a single file, and had Docker, I mounted a volume, spun up a container, and fetched the Docker install script into the mounted directory.  I then exited the container and tried to run the script.  The script seemed to think that Snappy is like normal Ubuntu and tried to run apt-get.  It failed miserably.  With an ancient version of Docker and difficulty adding the most basic of utilities, I didn’t even want to try taking on the beast that is wireless.  And so I decided that I wouldn’t use Snappy.

I had thought that this post would have two parts, but obviously that didn’t work out.  The story continues (and hopefully finds a happy ending) in part 3.

What OS for Docker host? (Part 2)

This is a continuation from What OS for Docker host? (Part 2) where I tried out Atomic Host and Alpine.

RedHat or Ubuntu

I set up machines to run Docker all the time usually on a RedHat/CentOS or Ubuntu system.  If I had selected either of those, the laptop would be up and running already, but that’s not the real point of this exercise.  I’m interested in learning about alternatives–especially those that will give me Docker goodness and not a lot of stuff I don’t need.  If I couldn’t find anything else, plan B was to fall back to my comfort zone, but that would mean failure.  And so I decided that I wouldn’t use RedHat or Ubuntu.

Puppy

I like Puppy Linux because it runs quickly even on older hardware.  It’s been awhile since I’ve played with it and I found there are now more flavors.  The “Long-Term-Support” releases were pretty old (two or more years) and so I didn’t want those (Docker likes a newer kernel).  So I downloaded a more recent “Slacko Puppy 6.3” which is apparently a Slackware-compatible version of Puppy.  The download and install when fairly smoothly except for some issues getting things setup correctly with GParted.  However, when I tried to install Docker I got an error saying that Docker only supports 64 bit platforms.  I didn’t know that and had grabbed the 32 bit release.

Another download, burn and install later, I had the 64 bit version of Puppy ready to go.  There were three different network configuration tools and the first two didn’t seem to want to set up the wireless for me, but the third one I tried (called “Frisbee”) went quite smoothly.  However, I was unable to SSH into the machine–there was no SSH server installed.  I used the package manager to install OpenSSH.  The first couple attempts failed with no useful error messages.  Eventually it reported success, but I never managed to connect via SSH.

The package manager didn’t seem to know about Docker and I ran into the same problem I had with Alpine when trying to use the Docker installer–the platform isn’t supported.  So I did a manual install of the binary.  Unfortunately, when I tried running the Docker daemon I got errors stating the Docker couldn’t create the default bridge due to problems setting up the ip tables.  And so I decided that I wouldn’t use Puppy Linux.

Rancher OS

With a little searching, I found Rancher OS which is allegedly “the perfect little place to run Docker”.  I found the concept being the OS to be intriguing–apart from a small base which provides footing for Docker to run, all the system services are run in Docker containers.  There are actually two Docker daemons running: one for the system and one for “normal” Docker stuff.

The install process took me a few tries, but admittedly it was user error on my part.  Rancher OS didn’t want to install on the hard drive at first because it was partitioned and mounted and so I had to search around for the magic commands to remedy that.  I then had an install go through, but when I booted up I couldn’t log in–apparently once installed the default user/pass no longer works and you can only connect in via the keys provided during install.  I had provided no key and thus had no way to access the newly install operating system.  Note that this what not the fault of the installation instructions, but rather my failure to read and follow carefully.  Going through a the next time was a smooth process.

With the auth key, I was easily able to ssh into the machine.  I had no problem running various Docker containers.  The OS came with version 1.9.1 of Docker, but I realized I hadn’t installed the latest version of Rancher OS.  The upgrade process was as simple as running:

sudo ros os upgrade

An interesting thing about both the install and upgrade was that most of the process seems to be just pulling down Docker images.  It only took a couple minutes and then apparently the operating system was updated to v0.4.3. When I checked the Docker version again I was pleased to see that it now reported 1.10.1 which is exactly what i wanted.

So now it seemed like the only thing that I was missing was wireless network connectivity.  Wireless, or rather lack there of, is a deal breaker for me, but I had found Rancher OS so interesting that I resorted to something I hate to do.  I asked for help.  Apparently, it is somehow possible to get wireless to work with Rancher OS, but no instructions were immediately forthcoming.  This was rather a bummer to me because I really hoped that Rancher OS would be it for me.  And so I decided that I wouldn’t use Puppy Linux.

The story continues in part 3.

What OS for Docker host? (Part 1)

Introduction

I have an old ThinkPad R61 with a cracked screen that has been gathering dust ever since Boy #2 inherited my old desktop. The idea of a [not quite] perfectly good computer going unused annoys me for some reason–there are potential CPU cycles that are simply not happening. While the hardware is dated, its Core2 Duo T7300 CPU runnng at 2.00GHz with 4GB of RAM certainly packs a much bigger wallop than my Raspberry Pi.  So I decided to set it up as a host for running Docker containers.  I then began my search for a suitable operating system.

Atomic Host

It seemed to me as though an Atomic Host (http://www.projectatomic.io/)  OS was exactly what I needed–an operating system “designed with the sole purpose of running containerized applications.”  So I grabbed the CentOS 7 Atomic Host ISO image, burned it to a DVD (it was around 775MB and my CD-R media maxes out at 700MB), put it in the laptop and hit the power button.  The install went smoothly and, even though I had an external monitor ready, was actually able to see everything well enough on the cracked screen.

Once in, I ran “sudo atomic host upgrade” to upgrade things (but it seemed like I already had the latest and greatest) and then restarted the machine.  I was able to ssh into the the machine and then started running containers–everything worked smoothly.  It was fast and easy to go from zero to Docker container on bare metal.  I was pleased and ready to try more.

I then checked the docker version and discovered that it was still on a 1.8 version.  I use Docker 1.8 and Kubernetes at work and was hoping to expand my horizons.  Specifically I want to use 1.9 or later because at home I’m playing with the new networks feature and also the new networking functionality in v2 of Compose.  Also, some of the fancy new images on Docker hub are officially supporting only 1.10.1.  There didn’t seem to be an obvious way to update Docker to a new version, but I assumed that to be easily solvable with a little kicking and swearing so I put it on the back burner.

Since I could now access the machine remotely, I wanted to get if off my disheveled desk.  I knew that thanks to my charging station there were plenty of free outlets, but places to plug in network cables are not as readily available in my home.   Since the laptop has all the hardware necessary for wireless goodness, I figured I’d just set that up.  Unfortunately, I couldn’t find any mention of configuring wireless networking on Atomic Host or even how to install drivers.  I expect that the CentOS packages could be used, but since Atomic Host doesn’t have yum, the install would have to be very different.  And so I decided that I wouldn’t use Atomic Host.

Alpine Linux

I only recently heard of Alpine Linux when I read that Docker Official Images are Moving to Alpine Linux, but I have used other BusyBox based distributions in the past, so I decided to give it a go.  Downloading the svelte 86MB ISO was much faster than the Atomic Host image as was the process of burning to a CD (with plenty of room to spare).  I put the disc in the laptop and booted it up.

Instead of an installer I got a message reading in part:

Mounting boot media failed.
initramfs emergency recovery shell launched. Type 'exit' to continue boot

A little searching revealed the error to be not uncommon when booting from a USB drive, but I could find no mention of the problem occurring with an install from CDROM and the typical solution didn’t seem to quite fit.  So I wrote the image to the USB drive, but the first time I tried, it hung while loading the installer.  My third attempt had both the CD and the USB drive in the machine and I’m actually not sure which was used (or perhaps both?), but the installer loaded.  It was a simple, text based user interface and the actual install process didn’t take too long.

Once installed, I wanted to see if I could succeed with Alpine where I failed with Atomic Host.  Because of the lightweight nature of Alpine, wireless isn’t supported out of the box like it is in more robust distributions.  However, following the clear instructions on instructions on the Alpine Wiki soon remedied my need for a wireless connection and I was ready to move the laptop off my disheveled desk–or so I thought.

There are a few ssh choices in the installer and I opted for OpenSSH.  I tried to connect via ssh, but it would not accept my credentials.  At first I thought I had forgotten the password.  After panicking I then did some poking around and learned that /etc/ssh/sshd_config contains the directive “PasswordAuthentication no”.  Presumably changing the “no” to “yes” would have worked, but I instead opted to use public/private RSA keys for authentication instead.  I had no issues setting up the keys and then I could connect via SSH and I moved the laptop into the dining room and put it on a spare chair next to an empty outlet.

Since package managers and distributions often come with older versions, I like to follow these Linux Docker installation instructions.  So I installed curl, but when I went to run the script it didn’t work as I’m accustomed to seeing on RHEL or Ubuntu.

alpy:~# curl -fsSL https://get.docker.com/ | sh<
Either your platform is not easily detectable, is not supported by this
 installer script (yet - PRs welcome! [hack/install.sh]), or does not yet have
 a package for Docker. Please visit the following URL for more detailed
 installation instructions:
    https://docs.docker.com/engine/installation/

Once again I found a relevant Alpine Wiki page and once again found the instructions to be clear and easy to follow.  I was further pleasantly surprised to see that it installed version 1.10.1 which had been built only four days previously.

Now I wanted to Docker Compose and I like to install it as a container.  There were no errors on the install, but when I tried to run it I got:

alpy:~# which docker-compose
/usr/local/bin/docker-compose
alpy:~# docker-compose version
-ash: docker-compose: not found

The fix for that was simply to modify the first line of /usr/local/bin/docker-compose to read “#!/bin/ash” instead of “#!/bin/bash“.  After that it seemed happy.

Now I was ready to run some containers.  I tried running a Docker Registry and got an error reading:

 failed to register layer: ApplyLayer exit status 1 stdout: stderr: chmod /bin/mount: permission denied

The error actually occurred during the pull and I found I could not even pull the image (which is interesting because I had just successfully pulled and ran Compose).  Searching revealed other people who had seen the same error on Alpine doing Dockery stuff.  I found a blog entry about Installing Docker (Daemon) on Alpine Linux in which the author saw the error when running Docker build and gave a magic incantation to make the problem go away:

 sysctl -w kernel.grsecurity.chroot_deny_chmod=0

Whatever that did under the covers, it removed the error.  However, I immediately ran into other permission related problems.

alpy:~# docker run -d -p 5000:5000 --name registry registry:2
a8fc19a787c0ad7e5ea9fc17a7283261b68ac8fa4c154f7eea235bbf3978196d
alpy:~# docker logs a8fc19a787c0ad7e5ea9fc17a7283261b68ac8fa4c154f7eea235bbf3978
196d
/bin/registry: error while loading shared libraries: librados.so.2: cannot enable executable stack as shared object requires: Permission denied

I was able to get some other containers to work including a rest service that I wrote that uses Alpine as a base image, but I was troubled that the registry didn’t want to run.  Alpine is not only small, but is also security-oriented.  In this case it seems like it is too secure to run everything I need (at least without a lot of extra knowledge).  And so I decided that I wouldn’t use Alpine.

The story continues in part 2.

Charge it!

2016-02-14 12.18.45
With Christmas came the discovery that we have a lot of portable electronic devices including (but not limited to):

  • 3 cell phones
  • 4 Kindle Fire tablets (assorted models)
  • 1 Nook e-reader
  • 2 3DS XL gaming systems
  • 3 Fitbit pedometers
  • 4 laptop computers
  • 1 TI-84 Plus C Silver Edition Graphing Calculator

Each device came with a means by which it can be connected to a wall outlet so that the battery can be charged.  This led to having devices perched in random places wherever a free outlet could be found and of course nobody could find their device when it was desired and the correct type cord could never be located when it was needed most direly.

So I built a charging station with to provide a home for various gadgets.  There are several shallow drawers that can each hold an electronic device and a shelf on the bottom which can hold a laptop.

The plywood body and solid trim are birch and the drawer handles were cut from some scrap oak that was leftover from another project. Because I wanted this to be a fast and cheap project, purchasing fancy drawer hardware wasn’t really an option so I sanded some poplar and found it to make serviceable drawer guides.

The middle portion of the piece is conveniently at the same height as a wall outlet and there is a smaller shelf there on which fit a couple multi-port USB charging devices.  From there cords are routed to all the drawers above and the laptop shelf below.  Most of the cords end with USB Micro-B plugs since that is what is used by most of the devices, but also we have a USB Mini-B for the calculator, the proprietary chargers for the 3DS systems, an extra power supply for the laptop, and the funky Fitbit Flex charging cable.

I meant to stain the wood, but it got put into use before I had the opportunity. Devices still go missing occasionally, but much less frequently than before. There are no more battles over cables and so devices are more likely to be charged. Once again we have free outlets in our home.

2016-02-14 13.49.182016-02-14 13.49.18

A less obvious benefit is the ease with which my wife or I can assess which devices are in use. This is useful because there are rules which the children are expected to follow. We haven’t had any major problems with kids abusing screen privileges. When it’s bedtime and devices are to be put away until the next day, it is simple the check that everything is where it should be.

I expect that we shall continue to have more portable electronic devices appear in our home and need charging.  Building the charging station was a quick, cheap, and fun way to address our current needs and we will evolve and adapt with what the future brings.

Analog Clock


When I was about six, I wanted a digital watch.  I still thought they were, as Douglas Adams would phrase it, “a pretty neat idea”.  I actually wasn’t that interested in having ready access to a time device, but rather I wanted a watch with a game on it.  Many kids my age desired a watch with Pac-Man, but I wanted a watch with a top-down shooter like Space Invaders.  Of course, like many childhood desires for immediate gratification, I was thwarted by my mother.

My father liked to build things with electronics and over the years he had produced various digital clocks packaged in Radio Shack plastic cases.  Thus I managed to be sufficiently informed of the time without having learned to read a traditional, analog clock.  I saw no problem with the status quo, but my mother saw this deficiency as a flaw in my education.  After various whining, complaining, and fussing on my part and unyielding patience on the part of my mother, an agreement was reached.  Once I mastered reading an analog clock (and my mother was clear I couldn’t just have a general idea about the process), I would be permitted to purchase the desired digital device.

I learned.  I got the watch.  I owned a few digital watches during the subsequent years.  Then Swatches became en vogue and so of course I jumped on that bandwagon.  Here I benefited from my mother’s insistence of mastery because most Swatches didn’t have tick marks or numbers.  I soon discovered that I preferred the analog face to a digital readout–to me the progression 60 minutes makes more sense when displayed in a circular fashion.  Since then, I have generally not worn digital watches.

Last night as I was going to sleep, I was thinking about how in the web world that digital displays are much more prevalent on web pages than analog.  So for fun, this morning I created a very simple, analog clock that can be displayed on a web page.

There are three basic technologies involved in my primitive clock:  HTML, JavaScript, and SVG (Scalable Vector Graphics).  Here’s what an HTML file looks like that displays the clock (with the important parts in bold):

<html>
    <head>
        <!-- I downloaded jQuery from http://code.jquery.com/jquery-2.2.0.min.js-->
        <script src="jquery-2.2.0.min.js"></script>
        <script src="clock.js"></script>
        <title>Analog Clock</title>
    </head>

    <body>

        <div class="clock"></div>

        <script>
            clock();
        </script>

    </body>
</html>

All the HTML really does is pull in the JavaScript goodness and kick off the clock() function that puts the clock into the “div” element.  I used jQuery to make it easier to find and modify various elements.

Below is the clock.js content.  There are some “magic” numbers:  300 is both the height and width and 150 is the midpoint (both vertical and horizontal).  The 1000 the 1000 milliseconds (one second) interval to wait between updates.

function clock() {
    setupClock();
    updateClock();
    window.setInterval(function(){ updateClock(); }, 1000);
}

var radius = 120;

function setupClock() {
    var svg = "<svg class='clockSvg' viewBox='0 0 300 300' width='300' height='300' >" +
        "<circle class='circle' cx='150' cy='150' r='50' stroke='black' stroke-width='2' fill='none' />" + 
        "<line class='hourHand' x1='150' y1='150' x2='0' y2='150' style='stroke:rgb(0,0,0);stroke-width:2;' />" +
        "<line class='minuteHand' x1='150' y1='150' x2='150' y2='0' style='stroke:rgb(0,0,0);stroke-width:2;' />" +
        "<line class='secondHand' x1='150' y1='150' x2='150' y2='0' style='stroke:rgb(0,0,0);stroke-width:1;' />" +
        "</svg>";
    $('.clock').html(svg);
    
    $('.circle').attr('r', radius);
    
    var now = new Date();
    updateSecondHand(now.getSeconds());
    updateMinuteHand(now.getMinutes());
    updateHourHand(now.getHours(), now.getMinutes());
}

function updateClock() {
    var now = new Date();
    var seconds = now.getSeconds();
    
    updateSecondHand(seconds);
    
    if (seconds == 0) {
        updateMinuteHand(now.getMinutes());
        updateHourHand(now.getHours(), now.getMinutes());
    }
};

function updateSecondHand(seconds) {
    var degrees = 6 * seconds - 90;
    updateHand('secondHand', degrees, .9 * radius);
}

function updateMinuteHand(minutes) {
    var degrees = 6 * minutes - 90;
    updateHand('minuteHand', degrees, .9 * radius);
}

function updateHourHand(hours, minutes) {
    hours %= 12;
    hours += minutes/60;
    var degrees = 30 * hours - 90;
    updateHand('hourHand', degrees, .7 * radius);
}

function updateHand(hand, degrees, length) {
    var rads = degrees / 180 * Math.PI;

    x2 = parseInt(150 + length * Math.cos(rads));
    y2 = parseInt(150 + length * Math.sin(rads));                
    
    $('.' + hand).attr('x2', x2);
    $('.' + hand).attr('y2', y2);
}

Drawing a clock face with SVG is simple–it is just a circle and some  lines and that is what the setupClock() function does.  All the various “update” functions do is move one of the ends of each of the lines.

After I put this together, I did a quick search for “svg clock” and of course found many fancier, more complicated implementations.  But I made this one and I don’t need numbers or tick marks or anything else–thanks to my mother . . .