Configuring a Raspberry Pi from Another Computer

Introduction

One thing I like about the Raspberry Pi is that it’s a small gadget that, once configured, only needs power in order to sit somewhere and do something.  For example, BakBoard runs on a Raspberry Pi that only plugs into a TV (for both power and display).  Unfortunately, in order to get everything running, I typically have ended up connecting various extra wires (network, keyboard, mouse, display) and work directly on the Pi before I can stick it in some random location to do what I want it to do.  Below are the steps I figured out so that I can do everything from my main computer and the only wire I need to my Pi is for power.

Prereqs

  • My main computer is currently running Ubuntu 16.04 although I think it would be easy to adapt the steps for most operating systems.
  • I have an SD card (32 GB in my case, but it probably only needs to be about 4GB).
  • I have an SD card adapter so I can read/write the SD card from my computer.

OS Image

To get the base image, I went to the Raspberry Pi Downloads Page and grabbed the latest Raspbian image (specifically 2017-01-11-raspbian-jessie-lite).  Once I had downloaded the zip, I opened it and then doubled clicked the image file (2017-01-11-raspbian-jessie-lite.img).  This brought up the Ubuntu image tool and it was easy to “restore” the image to the SD Card.

Wireless Networking

Since I don’t want to mess with a network cable, I want my Pi to be able to access my wireless network.  In order to do so, I modified the interfaces file.  It is in the image at etc/network/images.  Basically I changed the bit:

iface wlan0 inet manual
    wpa-conf /etc/wpa_supplicant/wpa_supplicant.conf

To be:

iface wlan0 inet dhcp
    wpa-ssid "NATHANS_NETWORK"
    wpa-psk "NATHANS_PASSWORD"

Obviously I plugged in the correct network name and password.

Enable SSH

The Raspbian OS used to have SSH enabled by default, but last year that changed as a security precaution.  The explanation for the change (and where I learned to do what is described below) is described on the Raspberry Pi Blog.

Basically, to enable ssh, I just create a file called “ssh” in the boot directory.  The contents of boot/ssh don’t matter–apparently the OS will see that file, enable ssh, and then delete the file.  The tricky part was that there were two “boot” directories.  There was one at the root of the volume, but there was actually a separate volume as well that is named boot–that’s the one where the ssh file must be created.

Authentication

The default password to  the Raspberry Pi is well-known which is nice because I don’t have to remember yet another password, but also a security risk since everyone knows it.  Instead, I like to use key based authentication and disable password authentication for ssh access.  Here’s how I did that:

First, I generated my public and private key (that was done a long time ago, and there are plenty of sources on the Internet how to do that).  My public key is id_rsa.pub (in the .ssh folder in my home directory) and the private key is id_rsa.  That creation was on my main computer.  Then, on the Raspberry Pi volume, I created the directory home/pi/.ssh.  I then copied the public key file (id_rsa.pub) into the home/pi/.ssh folder and also copied the file and named the copy “authorized_keys”.

Then, to disable password authentication via SSH I opened up the file etc/ssh/sshd_config in a text editor and changed:

#PasswordAuthentication yes

UsePAM yes

To be:

PasswordAuthentication no

UsePAM no

Conclusion

Once the above has been completed, I can stick the SD card into the Raspberry Pi and then plug in the Pi (giving it power).  It automatically connects to the wifi and I’m able to SSH into it without a password.  There’s nothing new here that can’t be found in various places online, but I’ve gathered the pieces together for my own reference at least.  Here are a few “gotchas” I encountered along the way:

  • All of the paths mentioned above are relative paths–the volume might be mounted in various places–in my place it was something like /media/nathan/90asd8f60s9g69789sd6gjherlkuyds8 for the main volume and /media/nathan/boot for the boot volume.
  • As mentioned before, there are two “boot” directories–make sure that the “ssh” file is created in the boot volume.
  • In order to create/modify some of the files, I had to use sudo (or change to root).
  • I the past, I used to have to run raspi-config to expand the volume to use all available space on the SD card, but that no longer seems necessary–it now seems to happen automagically.
  • Even though password authentication is disabled for SSH access, whenever logging in there is still a warning.  I usually do change the password and just write it down somewhere since I never use it.
I love it when a plan comes together

After spending a lot of effort and encountering difficulties in creating pieces, I am often pleasantly surprised when the pieces come together quickly and easily.  This was the case for my latest home improvement tech project.  In my home, it seems like some areas are warmer than others–I realized that some variance will exist, but I wanted to reduce the overall difference between upstairs and downstairs.

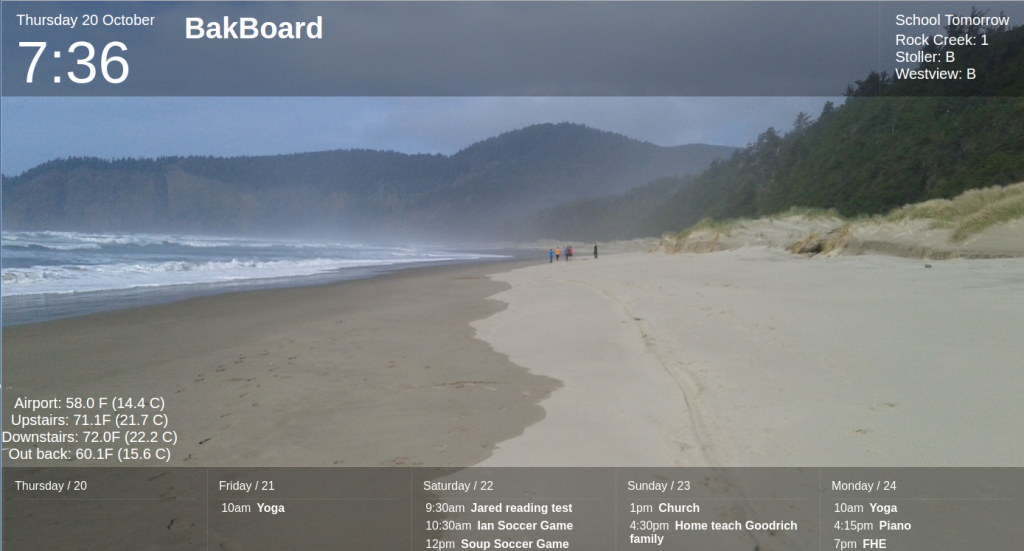
The first step was to be able to measure the temperature or each area.  Thanks to my ESP8266 development boards, I am able to publish the upstairs temperature and publish it to a database and Bakboard.  With the new Nest thermostat and a little playing with the REST API, I was able to do something similar and publish the downstairs temperature to the BakBoard.  There are now four temperatures published on the Bakboard.

temps

I then wrote a simple Java program with that basically does the following:

  1. Get the temperature of the [Downstairs] thermostat
  2. Get the temperature of the [Upstairs] temperature sensor
  3. If the difference between the two temperatures is greater than 2 degrees, turn on the furnace fan

I had a little trouble figuring out how to turn on the fan, but this is the way I implemented it in Java:

public void runFan(String thermostatId, String authToken) throws Exception {
    final String rootUrl = "https://developer-api.nest.com";
    HttpPut httpPut = new HttpPut(String.format("%s/devices/thermostats/%s/fan_timer_active", rootUrl, thermostatId));

    StringEntity putEntity = new StringEntity("true");
    httpPut.setEntity(putEntity);
    httpPut.addHeader("Content-Type", "application/json");
    httpPut.addHeader("Authorization", "Bearer " + authToken);
        
    CloseableHttpClient httpclient = HttpClients.createDefault();
    try {
        CloseableHttpResponse response = httpclient.execute(httpPut);
            
        // We need to handle redirect
        if (response.getStatusLine().getStatusCode() == 307) {
            String newUrl = response.getHeaders("Location")[0].getValue();
            httpPut.setURI(new URI(newUrl));
            response = httpclient.execute(httpPut);
        }
           
        try {
            HttpEntity entity = response.getEntity();
            EntityUtils.consume(entity);
        } finally {
            response.close();
        }
    } finally {
        httpclient.close();
    }
}

Of course I want my code to run at regular intervals, but fortunately I had already figured out how to go about running a Java program every 15 minutes.  It was easy to toss everything into a Docker container and let it do its thing.

Here are a few notes/design decisions that I made when putting things together:

  • There are no changes to the basic functionality of the Nest thermostat.  It is not aware of the external temperature sensor and heats/cools as normal.  This means, even if something goes wrong in my code (or network connection or custom hardware or somewhere else), things can’t go too crazy.
  • My code does not control the length the fan runs–it starts the fan and lets the Nest take care of turning it off.  There is a default run time that can be set on the thermostat–in my case I set it to 15 minutes to match the run duration of my new program.
  • I have a two stage furnace and when just the fan is run it goes at half speed.  Even at full speed the furnace fan is pretty quiet, and at half speed we don’t even notice.
  • The thermostat only gives me the temperature in degree increments (if I were using Celsius it would be in half degree increments).  My homemade temperature sensor goes to greater precision, but it’s hard to say whether that greater precision provides better accuracy.  I went with a 2 degree variance threshold for enabling the fan to allow for rounding differences as well as accuracy differences between upstairs and downstairs temperatures.

As far as I can tell, everything came together smoothly and “just works” and has been for the past few weeks.  Occasionally I check the log to make sure it’s still running.  Once in awhile when I walk past the Nest I notice the fan icon indicating that the fan is running (and I can verify that by putting my hand near a vent).  The weather is still mild, so it will be interesting to see what happens when it gets colder (especially when I rev up the wood stove), but so far there seems less variance in temperature throughout the house.  I love it when a plan comes together . . .

My New Toy (Part 4)

I finally got to the point where my new toy is able to publish temperature information to a database, so next is to make that information available on BakBoard.  With the main pieces already deployed, the only thing necessary is to add the necessary connections.

First I wrote a some JavaScript to poll the Webdis/Redis server for the temperature.  For extra credit I also have it contacting the FAA Services REST API to get information about weather at the Portland airport.  Below is “temperature.js”.

function temperature() {
    setupTemperature();
    updateTemperature();
    window.setInterval(function(){ updateTemperature(); }, 100000);
}

function setupTemperature() {
    $('.temperature').html("<div class='pdx'/><div class='upstairs'/>");
}

function updateTemperature() {
    var myJson;
    var url = "http://192.168.1.35:7379/GET/temperature";
    
    myJson = $.getJSON(url, function(obj) {
        var f = parseFloat(obj.GET);
        var c = (f - 32) * 5 / 9;
        $('.upstairs').html("Upstairs: " + f.toFixed(1) + "F (" + c.toFixed(1) + " C)");
    });
    
    url = "http://services.faa.gov/airport/status/PDX";
    myJson = $.getJSON(url, function(obj) {
        $('.pdx').html("Airport: " + obj.weather.temp);
    });
};

And here’s a very simple HTML file that uses the script above to display the airport and upstairs (where I put my new toy) temperatures:

<html>
    <head>
        <!-- I downloaded jQuery from http://code.jquery.com/jquery-2.2.0.min.js-->
        <script src="jquery-2.2.0.min.js"></script>
        <script src="temperature.js"></script>
        <title>Temperature</title>
    </head>
    <body>
        <div class="temperature"></div> 
        <script>
            temperature();
        </script>
    </body>
</html>

Viewing that script in a browser showed:

Airport: 73.0 F (22.8 C)
Upstairs: 71.1F (21.7 C)

I basically added the bold HTML parts to the BakBoard .html file along with some css goodness and the temperature information is now displaying on BakBoard.

bakboardTemp

I had fun playing with my new toy and learned a lot.  The ESP8266 seems to have a lot of potential and I want to try more things.  Of course now that I have my only module in use, I may have to get another one for play . . .

Less social networking, more familial interaction

It seems to me that as technology drops in price and becomes ubiquitous that it tends to focus on the individual and neglect the family unit.  I don’t see this as a deliberate attack on families, but I do see opportunities for innovation an effort in improving technology to make things easier for families.

A phone number used to be associated with a location–dialing a personal phone number would cause the phone to ring in a home.  Today, more people are cutting the land line and only using cell phones and this sometimes makes effective communication more difficult because there is no way to contact anyone in the family, only a particular individual.  This is particularly difficult for my kids who want to call friends–the younger ones don’t have cell phones yet, but when both parents work, calling cells simply doesn’t work.

Another example is the calendar.  Traditionally there would be a calendar on the wall or refrigerator that would be used to track activities for the family as a whole as well as individual family members.  Electronic calendaring systems have been around for quite some time now, but still paper calendars seem the norm for families.

It was the calendar that got me started making BakBoard, and it seems many other people have had similar ideas.  Just today I learned about the wall mounted information display created by Tom Scott which has a calendar, weather information, and (my favorite) a countdown timer to help get the kids out the door to catch the bus.  There’s also the Wall Mounted Calendar and Notification Center which doesn’t have the bus timer, but does have some buttons to change the calendar view and to refresh the web page.  Additionally there is a simple Raspberry Pi Wall Mounted Google Calendar.

BakBoard is an attempt to try to make a gadget designed for consumption by the family rather than an individual.  It remains in a known, central location and displays information for the entire household.  However, I think the technology involved is primitive when compared to many services out there tailored to the individual.

I think the Amazon Echo is going in the right direction a device for a family rather than the individual and it is considerably more sophisticated than BakBoard.  Boy #2 uses it to listen to music while washing the dishes.  Boy #1 uses it to remind him when it’s time to go to school.  Boy #3 likes the corny jokes it tells and also adds random items to the shopping list.  The girl child can ask it how to spell words.  The caveat is that everything happens on my account.  It is possible to switch between accounts (both my wife and I have accounts but the kids don’t), but it seems cumbersome.  Also, many of the integrations are user specific.

There is a lot of room for improvement in making technology look at the family rather than the individual.  From what I’ve seen, the biggest complications are finding a good way to balance privacy and security.  Other issues include treating the family as a unit while still recognizing that the family is made up of individuals.  Since I don’t dislike my family, this is an area which I want to further explore.


BakBoard

BakBoard

A couple months ago I had the idea that it would be nice to have a display in the kitchen to help the family be organized and coordinated.  I wanted it to have a clock, school schedule information, calendar information, and a family Fitbit leaderboard and to power it with my Raspberry Pi.

While searching around I came across DakBoard which seemed close to what I wanted.  It provides date/time information and displays calendar events.  Additionally it can display weather information, but the really brilliant piece it has that I was missing from my idea was to display pictures.  I immediately created an account to try it out, but unfortunately ran into some problems with the Dropbox integration and was unable to get support in the forum and my e-mails for help went unanswered–it seems not much is happening with DakBoard.  Since the code isn’t open source and it didn’t provide for my requirements, I went about creating my own “BakBoard”.

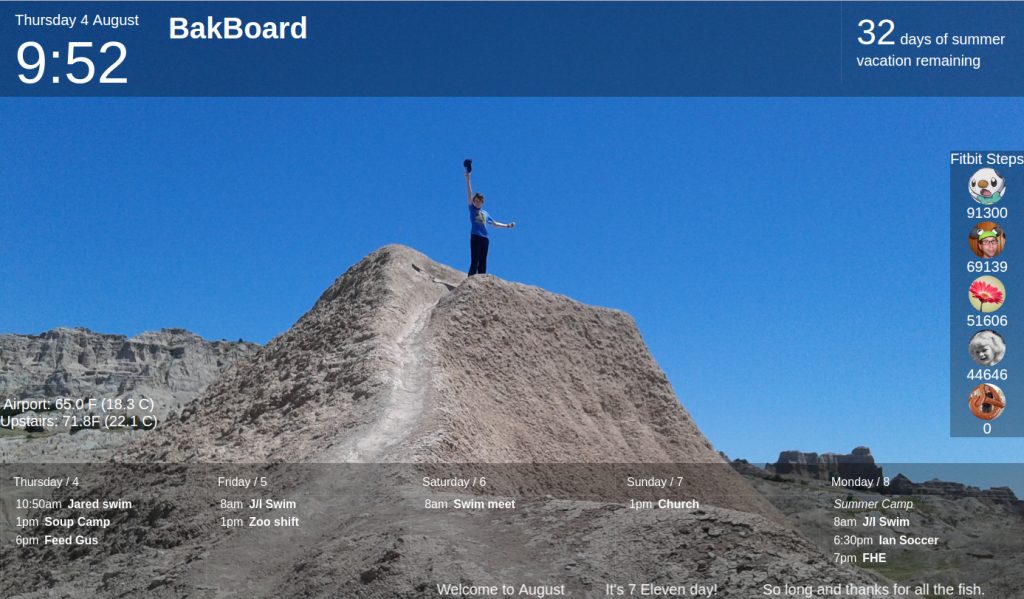
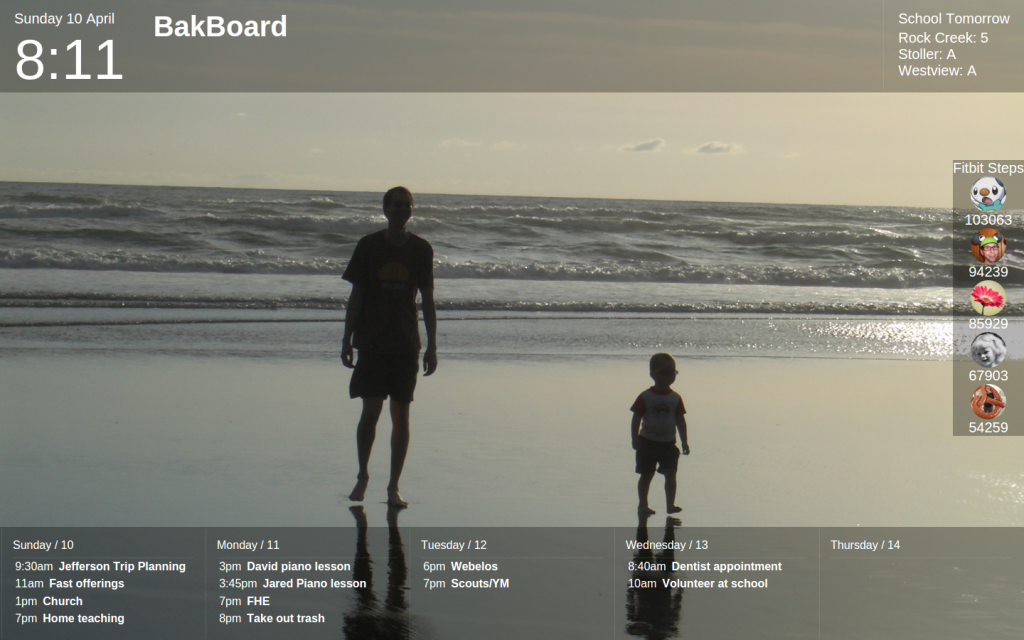
The above picture is a screen shot I took of BakBoard this evening.  It currently has the following features:

  • Date/time in the top left.
  • School information in the top right.  If it is before 4:00pm, it displays the schedule for the current day and after 4:00pm it displays the schedule for the next day.  The service that provides the school schedule information is described in this post.
  • Calendar information on the bottom.  It provides five days of information: the current day and the next five days.
  • Fitbit leaderboard on the right.  Currently it just has the avatar and number of steps.
  • Picture is the background for the entire board.  The pictures come from from selected subdirectories in my DropBox folder.  The picture changes every 10 seconds.

It remains a work in progress and I’m learning a lot, but already the family enjoys having the BakBoard display in the kitchen.  In future posts I may describe how things are implemented, what I’ve learned in the process, and new features added.