Today my new toy arrived. It’s an ESP8266 IOT WiFi Module.
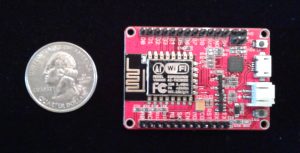
Specifically I selected the “Elecrow ESP8266 IOT Board WiFi Module with Built in USB and Battery Charging” out of the many ESP8266 variants because of the following features:
- Onboard USB (I find it easier than FTDI)
- NOT breadboard friendly (Pins sticking up not down)
- In stock and eligible for Prime shipping
To start with, I just wanted to verify that I could run some code on it. Here’s what I did:
- Installed the Arduino IDE from https://www.arduino.cc/en/Main/Software. I used the latest available (1.6.9).
- Configured the Arduino IDE to support ESP8266 boards:
- Opened up the preferences and added http://arduino.esp8266.com/versions/2.3.0/package_esp8266com_index.json to the “Additional Boards Manager URLs”.
- Opened the “Boards Manager”, found the “esp8266” listing, and clicked the “Install” button (using the latest 2.3.0 version).
- Since there wasn’t a specific Electrow entry, I selected “Generic ESP8266 Module” for the board type.
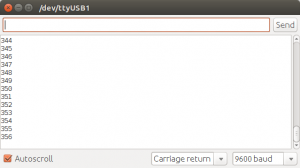
- Wrote some code. Here is my very simple sketch to slowly count and send the number via serial:
int count = 0; void setup() { Serial.begin(9600); } void loop() { Serial.println(count++); delay(1000); } - Ran the code. I uploaded it to the module, opened the serial terminal, and saw that it was counting as designed.
Of course it took a bit of kicking and swearing to do that. Here are a few of the things that I did before everything worked:
- Ran the Arduino IDE as root
- The upload speed is 115200, but the terminal speed is 9600 baud
- Change the reset method to “nodemcu”.
- Sometimes (but not always) hold the flash button and than hit the reset button before I could successfully upload my sketch.
- Switch USB cords (the first is a cheap, old cord that in recent years has only been used for charging devices).
- Check the port whenever I plugged in the module (it sometimes switched between /dev/ttyUSB0 and /dev/ttyUSB1 just to spite me).
There’s nothing exciting about my counting program, but by getting it running I confirmed that I can 1) Connect to the module 2) Upload code to it and 3) Run the code. Now that I can do that, I can see what else I can make my new toy do . . .
One thought on “My New Toy (Part 1)”