Can I have screen time?

Nanny State
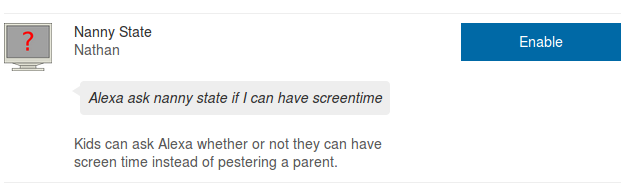
Screens provide “cheap” entertainment.  By “cheap” I’m not referring to the cost in terms of money, but rather effort to participate.  It’s much easier to turn on the TV and vegetate than to go on a hike and easier to hop on social media than call up a friend and go see a movie.  Because of the ease, screens are often the go-to entertainment choice.

In my home, the kids tend to frequently want screen time not only in lieu of entertainment that requires effort, but often instead of performing other, more important tasks.  So, when a kid expresses a desire to a parental unit for permission to utilize a screen, the parent typically ascertains things such as:

  • Status of homework
  • Status of chores
  • Completion of daily instrument practice
  • State of personal space (room clean, bed made, etc.)
  • If any sanctions are in place prohibiting screen use

Even though the kids are familiar with the criteria, usually there are multiple requests made before the kid has completed everything necessary to be allowed screen time.  Each of the rejections could be deemed as a negative parent/child interaction.  I decided to offload this monotonous task and created Nanny State.

Nanny State is a Alexa Skill for the Amazon Echo.  Basically, a kid says “Alexa, ask Nanny State if I can have screen time.”  The kid then must respond to a few yes/no questions covering the items in the list above.  If the kid provides an unsatisfactory answer, the response is “No screen for you.”  If all answers are as they should be, the kid is instructed to confirm with a parent.

For fun, I submitted Nanny State to Amazon.  This morning I received an e-mail stating that “Your Alexa skill Nanny State is now live!”.  This means that anyone who owns an Echo can go to the Alexa App or http://echo.amazon.com/#skills and enable Nanny State (or click on the image and it will take you there).

enableNannyState

Less social networking, more familial interaction

It seems to me that as technology drops in price and becomes ubiquitous that it tends to focus on the individual and neglect the family unit.  I don’t see this as a deliberate attack on families, but I do see opportunities for innovation an effort in improving technology to make things easier for families.

A phone number used to be associated with a location–dialing a personal phone number would cause the phone to ring in a home.  Today, more people are cutting the land line and only using cell phones and this sometimes makes effective communication more difficult because there is no way to contact anyone in the family, only a particular individual.  This is particularly difficult for my kids who want to call friends–the younger ones don’t have cell phones yet, but when both parents work, calling cells simply doesn’t work.

Another example is the calendar.  Traditionally there would be a calendar on the wall or refrigerator that would be used to track activities for the family as a whole as well as individual family members.  Electronic calendaring systems have been around for quite some time now, but still paper calendars seem the norm for families.

It was the calendar that got me started making BakBoard, and it seems many other people have had similar ideas.  Just today I learned about the wall mounted information display created by Tom Scott which has a calendar, weather information, and (my favorite) a countdown timer to help get the kids out the door to catch the bus.  There’s also the Wall Mounted Calendar and Notification Center which doesn’t have the bus timer, but does have some buttons to change the calendar view and to refresh the web page.  Additionally there is a simple Raspberry Pi Wall Mounted Google Calendar.

BakBoard is an attempt to try to make a gadget designed for consumption by the family rather than an individual.  It remains in a known, central location and displays information for the entire household.  However, I think the technology involved is primitive when compared to many services out there tailored to the individual.

I think the Amazon Echo is going in the right direction a device for a family rather than the individual and it is considerably more sophisticated than BakBoard.  Boy #2 uses it to listen to music while washing the dishes.  Boy #1 uses it to remind him when it’s time to go to school.  Boy #3 likes the corny jokes it tells and also adds random items to the shopping list.  The girl child can ask it how to spell words.  The caveat is that everything happens on my account.  It is possible to switch between accounts (both my wife and I have accounts but the kids don’t), but it seems cumbersome.  Also, many of the integrations are user specific.

There is a lot of room for improvement in making technology look at the family rather than the individual.  From what I’ve seen, the biggest complications are finding a good way to balance privacy and security.  Other issues include treating the family as a unit while still recognizing that the family is made up of individuals.  Since I don’t dislike my family, this is an area which I want to further explore.


BakBoard

BakBoard

A couple months ago I had the idea that it would be nice to have a display in the kitchen to help the family be organized and coordinated.  I wanted it to have a clock, school schedule information, calendar information, and a family Fitbit leaderboard and to power it with my Raspberry Pi.

While searching around I came across DakBoard which seemed close to what I wanted.  It provides date/time information and displays calendar events.  Additionally it can display weather information, but the really brilliant piece it has that I was missing from my idea was to display pictures.  I immediately created an account to try it out, but unfortunately ran into some problems with the Dropbox integration and was unable to get support in the forum and my e-mails for help went unanswered–it seems not much is happening with DakBoard.  Since the code isn’t open source and it didn’t provide for my requirements, I went about creating my own “BakBoard”.

The above picture is a screen shot I took of BakBoard this evening.  It currently has the following features:

  • Date/time in the top left.
  • School information in the top right.  If it is before 4:00pm, it displays the schedule for the current day and after 4:00pm it displays the schedule for the next day.  The service that provides the school schedule information is described in this post.
  • Calendar information on the bottom.  It provides five days of information: the current day and the next five days.
  • Fitbit leaderboard on the right.  Currently it just has the avatar and number of steps.
  • Picture is the background for the entire board.  The pictures come from from selected subdirectories in my DropBox folder.  The picture changes every 10 seconds.

It remains a work in progress and I’m learning a lot, but already the family enjoys having the BakBoard display in the kitchen.  In future posts I may describe how things are implemented, what I’ve learned in the process, and new features added.

Charge it!

2016-02-14 12.18.45
With Christmas came the discovery that we have a lot of portable electronic devices including (but not limited to):

  • 3 cell phones
  • 4 Kindle Fire tablets (assorted models)
  • 1 Nook e-reader
  • 2 3DS XL gaming systems
  • 3 Fitbit pedometers
  • 4 laptop computers
  • 1 TI-84 Plus C Silver Edition Graphing Calculator

Each device came with a means by which it can be connected to a wall outlet so that the battery can be charged.  This led to having devices perched in random places wherever a free outlet could be found and of course nobody could find their device when it was desired and the correct type cord could never be located when it was needed most direly.

So I built a charging station with to provide a home for various gadgets.  There are several shallow drawers that can each hold an electronic device and a shelf on the bottom which can hold a laptop.

The plywood body and solid trim are birch and the drawer handles were cut from some scrap oak that was leftover from another project. Because I wanted this to be a fast and cheap project, purchasing fancy drawer hardware wasn’t really an option so I sanded some poplar and found it to make serviceable drawer guides.

The middle portion of the piece is conveniently at the same height as a wall outlet and there is a smaller shelf there on which fit a couple multi-port USB charging devices.  From there cords are routed to all the drawers above and the laptop shelf below.  Most of the cords end with USB Micro-B plugs since that is what is used by most of the devices, but also we have a USB Mini-B for the calculator, the proprietary chargers for the 3DS systems, an extra power supply for the laptop, and the funky Fitbit Flex charging cable.

I meant to stain the wood, but it got put into use before I had the opportunity. Devices still go missing occasionally, but much less frequently than before. There are no more battles over cables and so devices are more likely to be charged. Once again we have free outlets in our home.

2016-02-14 13.49.182016-02-14 13.49.18

A less obvious benefit is the ease with which my wife or I can assess which devices are in use. This is useful because there are rules which the children are expected to follow. We haven’t had any major problems with kids abusing screen privileges. When it’s bedtime and devices are to be put away until the next day, it is simple the check that everything is where it should be.

I expect that we shall continue to have more portable electronic devices appear in our home and need charging.  Building the charging station was a quick, cheap, and fun way to address our current needs and we will evolve and adapt with what the future brings.

Analog Clock


When I was about six, I wanted a digital watch.  I still thought they were, as Douglas Adams would phrase it, “a pretty neat idea”.  I actually wasn’t that interested in having ready access to a time device, but rather I wanted a watch with a game on it.  Many kids my age desired a watch with Pac-Man, but I wanted a watch with a top-down shooter like Space Invaders.  Of course, like many childhood desires for immediate gratification, I was thwarted by my mother.

My father liked to build things with electronics and over the years he had produced various digital clocks packaged in Radio Shack plastic cases.  Thus I managed to be sufficiently informed of the time without having learned to read a traditional, analog clock.  I saw no problem with the status quo, but my mother saw this deficiency as a flaw in my education.  After various whining, complaining, and fussing on my part and unyielding patience on the part of my mother, an agreement was reached.  Once I mastered reading an analog clock (and my mother was clear I couldn’t just have a general idea about the process), I would be permitted to purchase the desired digital device.

I learned.  I got the watch.  I owned a few digital watches during the subsequent years.  Then Swatches became en vogue and so of course I jumped on that bandwagon.  Here I benefited from my mother’s insistence of mastery because most Swatches didn’t have tick marks or numbers.  I soon discovered that I preferred the analog face to a digital readout–to me the progression 60 minutes makes more sense when displayed in a circular fashion.  Since then, I have generally not worn digital watches.

Last night as I was going to sleep, I was thinking about how in the web world that digital displays are much more prevalent on web pages than analog.  So for fun, this morning I created a very simple, analog clock that can be displayed on a web page.

There are three basic technologies involved in my primitive clock:  HTML, JavaScript, and SVG (Scalable Vector Graphics).  Here’s what an HTML file looks like that displays the clock (with the important parts in bold):

<html>
    <head>
        <!-- I downloaded jQuery from http://code.jquery.com/jquery-2.2.0.min.js-->
        <script src="jquery-2.2.0.min.js"></script>
        <script src="clock.js"></script>
        <title>Analog Clock</title>
    </head>

    <body>

        <div class="clock"></div>

        <script>
            clock();
        </script>

    </body>
</html>

All the HTML really does is pull in the JavaScript goodness and kick off the clock() function that puts the clock into the “div” element.  I used jQuery to make it easier to find and modify various elements.

Below is the clock.js content.  There are some “magic” numbers:  300 is both the height and width and 150 is the midpoint (both vertical and horizontal).  The 1000 the 1000 milliseconds (one second) interval to wait between updates.

function clock() {
    setupClock();
    updateClock();
    window.setInterval(function(){ updateClock(); }, 1000);
}

var radius = 120;

function setupClock() {
    var svg = "<svg class='clockSvg' viewBox='0 0 300 300' width='300' height='300' >" +
        "<circle class='circle' cx='150' cy='150' r='50' stroke='black' stroke-width='2' fill='none' />" + 
        "<line class='hourHand' x1='150' y1='150' x2='0' y2='150' style='stroke:rgb(0,0,0);stroke-width:2;' />" +
        "<line class='minuteHand' x1='150' y1='150' x2='150' y2='0' style='stroke:rgb(0,0,0);stroke-width:2;' />" +
        "<line class='secondHand' x1='150' y1='150' x2='150' y2='0' style='stroke:rgb(0,0,0);stroke-width:1;' />" +
        "</svg>";
    $('.clock').html(svg);
    
    $('.circle').attr('r', radius);
    
    var now = new Date();
    updateSecondHand(now.getSeconds());
    updateMinuteHand(now.getMinutes());
    updateHourHand(now.getHours(), now.getMinutes());
}

function updateClock() {
    var now = new Date();
    var seconds = now.getSeconds();
    
    updateSecondHand(seconds);
    
    if (seconds == 0) {
        updateMinuteHand(now.getMinutes());
        updateHourHand(now.getHours(), now.getMinutes());
    }
};

function updateSecondHand(seconds) {
    var degrees = 6 * seconds - 90;
    updateHand('secondHand', degrees, .9 * radius);
}

function updateMinuteHand(minutes) {
    var degrees = 6 * minutes - 90;
    updateHand('minuteHand', degrees, .9 * radius);
}

function updateHourHand(hours, minutes) {
    hours %= 12;
    hours += minutes/60;
    var degrees = 30 * hours - 90;
    updateHand('hourHand', degrees, .7 * radius);
}

function updateHand(hand, degrees, length) {
    var rads = degrees / 180 * Math.PI;

    x2 = parseInt(150 + length * Math.cos(rads));
    y2 = parseInt(150 + length * Math.sin(rads));                
    
    $('.' + hand).attr('x2', x2);
    $('.' + hand).attr('y2', y2);
}

Drawing a clock face with SVG is simple–it is just a circle and some  lines and that is what the setupClock() function does.  All the various “update” functions do is move one of the ends of each of the lines.

After I put this together, I did a quick search for “svg clock” and of course found many fancier, more complicated implementations.  But I made this one and I don’t need numbers or tick marks or anything else–thanks to my mother . . .