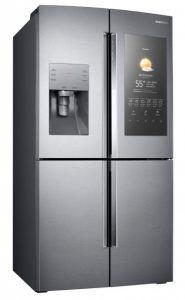
Unlike Talkie Toaster, the Samsung Family Hub Refrigerator is a real product and it has some interesting features. The product page lists features such as:
- Food Management (knowing what you have)
- Family Connection
- Entertainment
- Apps
It’s not until the “More features to love” section that there is any mention that this contraption can keep food cold. Perhaps that ability was considered obvious, but it’s interesting that the main purpose of the device is the last thing listed even though it does have some innovative cooling functionality such as FlexZone(TM) which lets you use the bottom right section as either a freezer or a fridge and a “Triple Cooling System” (apparently there are three separate evaporators to better maintain temperature and humidity).
I’d take the Family Hub Refrigerator if someone gave it to me, but I’m not going to rush out and buy one for $6,000. I think most people could have equal smart-fridge-satisfaction by purchasing a similarly sized high-end fridge for thousands less and then slapping a Triby on the door. Still, I think it’s worth looking at the “smart” features.
So the fridge doesn’t really sing, but it can stream music from Pandora or TuneIn. From how frequently the Amazon Echo is used to play music during chore time, I concur that it’s nice to be able to easily play music in the kitchen. However, this is a problem already solved in multiple ways and I’m not seeing the benefit of shoving that capacity into a refrigerator. I certainly know of no relationship between music and food cooling. I suppose it is possible that the size of the fridge could be used to improve sound quality (a big woofer in the bottom or using the full width to separate speakers for a better surround sound), but that doesn’t seem to be the case here. Something I see useful in some situations in a first world problem sort of way is screen mirroring–it can mirror your TV so that when you run in from the other room to grab a snack you don’t miss what’s going on in your show.
The Family Hub includes a clock, calendar, photo display, and notes–all features that are on BakBoard and are nice, but the only benefit I see putting it on the fridge is that it provides screen real estate in a convenient location. The screen can show weather information and some of the pictures suggest displaying the “word of the day” and “on this day in history” factoids. There’s a “Family Bulletin Board” display and a “Morning Brief” as well.
What’s more interesting are the food related features integrated with the Family Hub. Since a refrigerator is for food, I think making a smarter refrigerator should improve that relationship with food.
Putting cameras inside and letting you view the contents without opening the door (or even being in the vicinity if using the cell phone app) is a good attempt to make refrigerator a better refrigerator. My refrigerator is always more densely packed than the pristine Family Hub examples, so I’m not sure if it really is practical, but I would prefer it if my kids could look at a screen on the door instead of standing with the door open staring inside for minutes while trying to decide what to eat.
I won’t go into detail about the ability to search recipes or order groceries–I think those are fine and at least related to food, but not exciting. The obvious missing piece is that the Family Hub doesn’t really know what’s in it, so it can’t suggest recipes using ingredients you have, nor can it automatically order something when you are almost out of it. One video I saw mentions the ability to track the age of items in the fridge, but only if you always put the items back in the same spot–there aren’t any smarts to track item movement.
I think the main problem with the Samsung Family Hub is that it’s trying to be the hub of things instead of a thing in the Internet of Things. I want smart solutions for things like food management, but a picture of the inside where I don’t see any ketchup only tells me there is no ketchup in the fridge and doesn’t tell me whether there is any in the pantry or garage. The refrigerator is not the central hub of my home, it is merely one of many things in my home and any truly smart fridge will know its place–no matter how well it can sing.


 The nostalgia of coding and playing
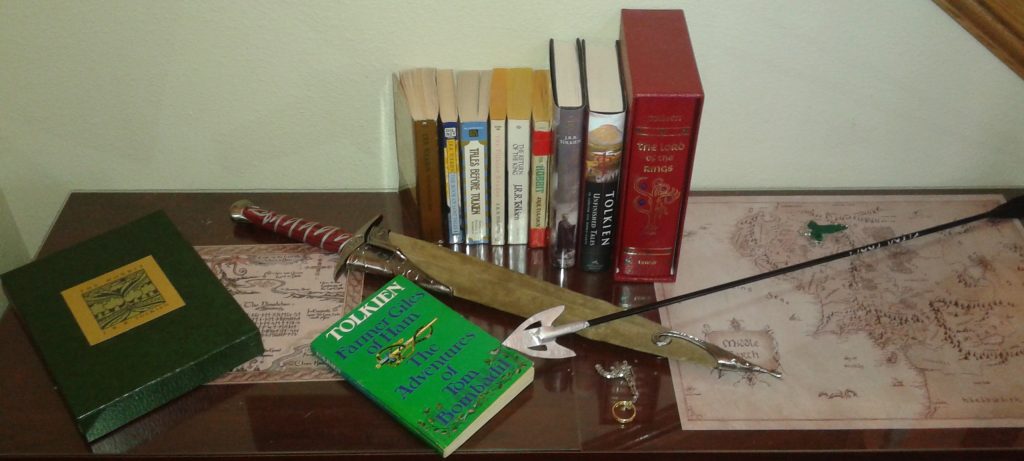 I have long been familiar with Tolkien’s The Hobbit and also The Lord of the Rings, but remained mostly ignorant of his other works apart from a 1982 print of The Silmarillion which somehow ended up in my collection. This past Mother’s Day my wife received a couple volumes of other Tolkien tales and I noticed in one that among the “other books by the author” it listed The Adventures of Tom Bombadil and was intrigued enough to order it in a volume combined with Farmer Giles of Ham.